In this tutorial, we will implement image edge detection in Python. Edge detection is a very common image processing technique.
To implement image edge detection in Python you can use the OpenCV library. One of the edge detection algorithms provided by OpenCV is the Canny algorithm.
We will go through the process of reading an image with OpenCV, converting it to grayscale, and generating a new image where edges have been detected.
Let’s see this in practice!
Which Python Library Can Be Used For Image Processing?
The OpenCV library allows performing image processing in Python. OpenCV stands for Open Source Computer Vision.
To install the OpenCV library you can use the following pip command:
pip install opencv-pythonThen you can test that the OpenCV library is available in your Python distribution by using the following import statement in the Python shell:
>>> import cv2Make sure Python doesn’t throw any errors.
How Do You Detect Edges in Images Using OpenCV and Python?
With the OpenCV library, you can read an image from a file using the imread() method. After that, you can apply any edge detection algorithm you want.
In this tutorial, we will try to detect edges for the Mona Lisa painting by Leonardo (download the JPEG file here).
After downloading the JPEG file rename it to mona_lisa.jpeg, then read it using OpenCV’s imread() function.
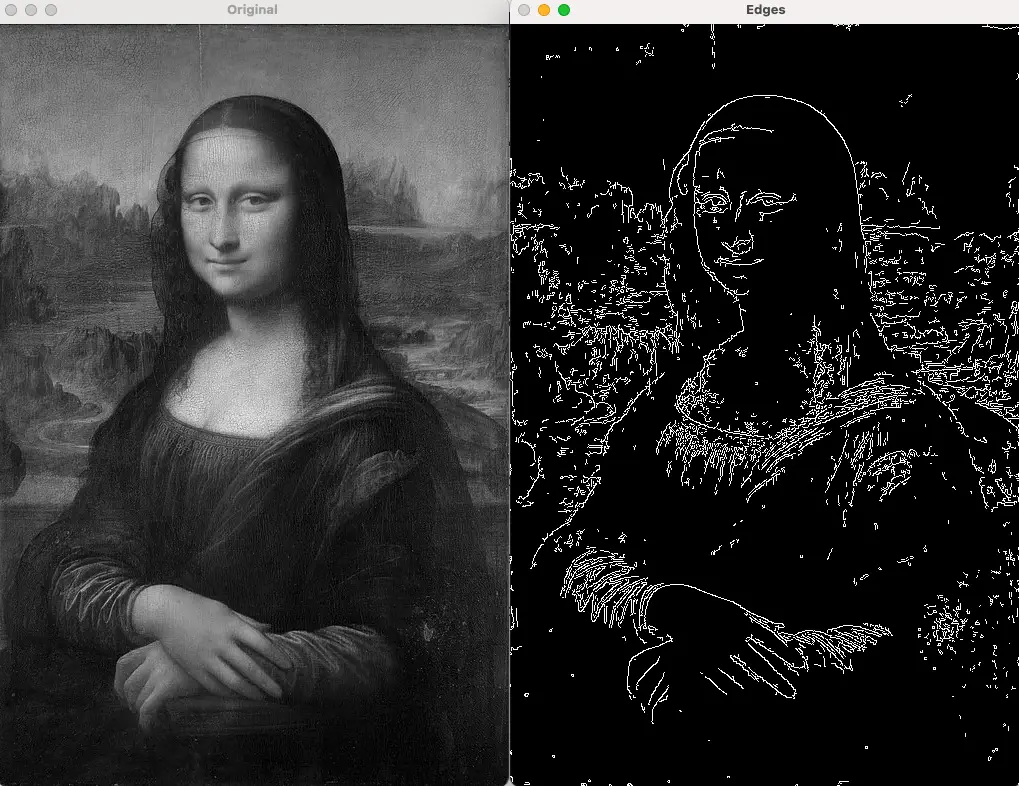
We will convert the image to grayscale to simplify the edge detection process considering that a grayscale image requires less computation than a color image.
import cv2 as cv

image_path = 'mona_lisa.jpeg'
image = cv.imread(image_path, cv.IMREAD_GRAYSCALE)
print(type(image))
To detect edges in this image you can apply the Canny edge detection algorithm implemented in OpenCV using the function cv2.Canny().
Below you can see the syntax of this function:
Canny(image, low_threshold, high_threshold)
Let’s apply it to our image by specifying threshold values (a low and a high threshold).
low_threshold=100
high_threshold=200
edges = cv.Canny(image, low_threshold, high_threshold)
The Canny edge detection algorithm returns an image with the edges detected.
We can use the imshow() function of the OpenCV library to display the two images:
cv.imshow("Original", image)
cv.imshow("Edges", edges)
But if you execute the Python program you will see that the images are not displayed. In reality, they are displayed briefly and then the two windows that show the images are closed immediately.
We have to use OpenCV’s waitKey() function that allows showing the images until a key is pressed using the following code:
cv.waitKey(0)
cv.destroyAllWindows()
Below you can see the original image and the image that shows the edges detected.
Full Program For Edge Detection in Python Using Canny Algorithm
Now that we have covered the basics of edge detection using OpenCV and the Canny algorithm, let’s create a full program you can execute to perform edge detection.
Let’s start by creating a function that receives the image path and the thresholds as parameters and then shows both the original image and the edges detected.
import cv2 as cv

def detect_edges(image_path, low_threshold=100, high_threshold=200):
    # Read the original image and convert it to grayscale
    image = cv.imread(image_path, cv.IMREAD_GRAYSCALE)

    # Use the Canny algorithm for edge detection
    edges = cv.Canny(image, low_threshold, high_threshold)

    # Display the original image and the edges identified
    cv.imshow("Original", image)
    cv.imshow("Edges", edges)

    # Close all the windows when the user presses a key
    cv.waitKey(0)
    cv.destroyAllWindows()
To recap we are going through the following steps:
- Read the original image and convert it to grayscale.
- Detect the edges using the Canny edge detection algorithm.
- Show both images, the original one and the one that contains the edges detected.
Notice that we are giving default values to the two thresholds in the signature of the function.
Now, let’s call this function by passing the image path to it:
if __name__ == "__main__":
    image_path = 'mona_lisa.jpeg'
    detect_edges(image_path)
The expression if __name__ == “__main__” prevents the code after the if statement from being executed if this Python file is imported as a module.
You can also pass different values for the thresholds when calling the function detect_edges() as shown below:
detect_edges(image_path, 100, 300)You could also refactor the function detect_edges() to just return the output of the Canny edge detection without displaying the images inside the same function.
This can be useful if you want to perform edge detection for multiple images without displaying them once the edge detection process is complete.
In this case, we could create a separate function to show the images:
import cv2 as cv

def detect_edges(image_path, low_threshold=100, high_threshold=200):
    image = cv.imread(image_path, cv.IMREAD_GRAYSCALE)
    edges = cv.Canny(image, low_threshold, high_threshold)
    return image, edges

def show_images(image, edges):
    cv.imshow("Original", image)
    cv.imshow("Edges", edges)
    cv.waitKey(0)
    cv.destroyAllWindows()

if __name__ == "__main__":
    image_path = 'mona_lisa.jpeg'
    image, edges = detect_edges(image_path)
    show_images(image, edges)
This is just an example of how you can refactor code in Python to make it reusable.
Notice that we have updated the function detect_edges() to return two values and those values are returned in a tuple:
print(type(detect_edges(image_path)))

[output]
<class 'tuple'>
The NumPy ndarray data type is used for both the original image and the edge-detected image returned by the function detect_edges().
What are the Two Thresholds in the Canny Edge Detection Algorithm?
The Canny edge detection algorithm uses two thresholds: a lower threshold and a higher threshold.
Given the gradient of a pixel, there are three possible options. The pixel gradient is:
- Below the lower threshold: the pixel is rejected.
- Between the two thresholds: the pixel is accepted as an edge only if it is connected to a pixel that is above the higher threshold.
- Above the higher threshold: the pixel is accepted as an edge.
The ratio recommended between the two thresholds for the Canny algorithm is between 2:1 and 3:1.
In the code we have written in the previous section we have used a ratio of 2:1. Try changing the ratio between the two thresholds to see the different outcomes in the edge detection process.
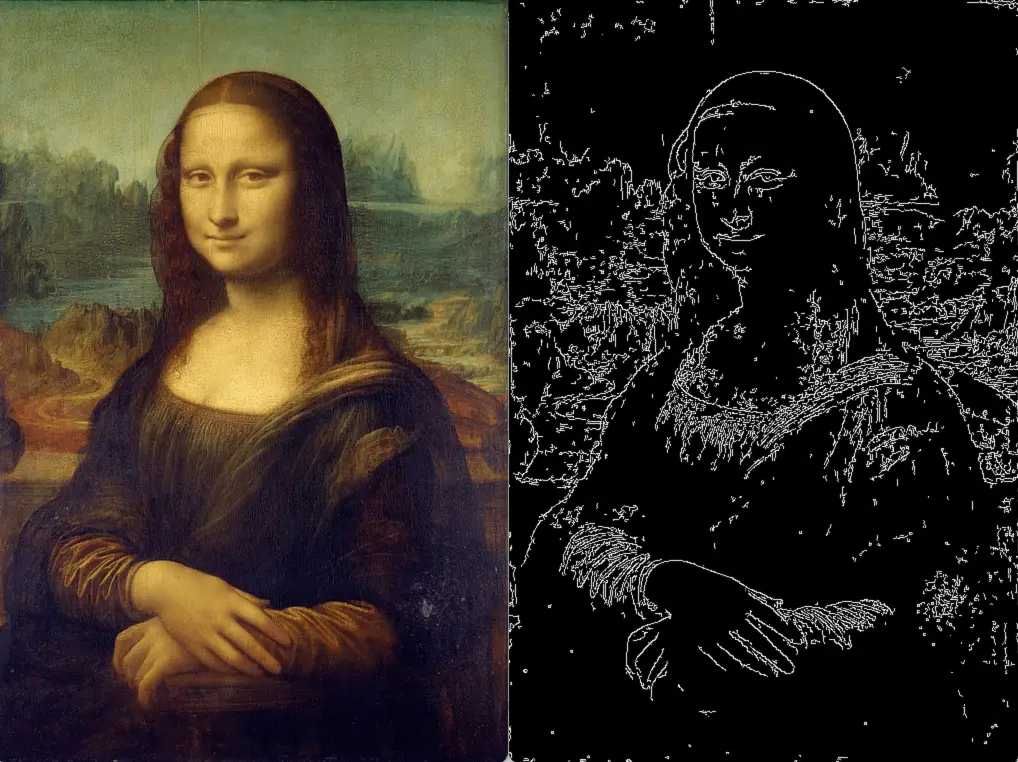
Edge Detector Comparison Between Color and Grayscale Images
Let’s compare the quality of the edges detected using the code we have created but this time passing a color image.
To use a color image you can simply remove the second argument from the following line of code:
image = cv.imread(image_path, cv.IMREAD_GRAYSCALE)This line becomes:
image = cv.imread(image_path)Below you can see the result and you can compare it with the result we got earlier in this tutorial when using a grayscale image.
Conclusion
In this Python tutorial, you have learned how to perform edge detection in Python using the OpenCV library.
While explaining how the Canny edge detection algorithm works we have also practiced refactoring in Python.
Related article: after refactoring the code I mentioned that one of the functions returns values in a tuple. Learn more about this data type by reading the CodeFatherTech tutorial about Python tuples.

Claudio Sabato is an IT expert with over 15 years of professional experience in Python programming, Linux Systems Administration, Bash programming, and IT Systems Design. He is a professional certified by the Linux Professional Institute.
With a Master’s degree in Computer Science, he has a strong foundation in Software Engineering and a passion for helping others become Software Engineers.