
In the past, a world of robots seemed like a daydream, and then, the information age came to be. Technology advanced and robotics developed into a field of study. Today, a common person (even a 7-year-old kid) can build a robot!
One of the easiest projects to tackle is a smart robot car. Curious? Here’s a guide on all you need to know about self-controlled cars including how to build one and how to choose one, along with reviews of the 5 best smart robot cars.
What Is a Smart Robot Car?
A smart robot car is a self-controlled automobile that functions to teach kids (12+), amateurs with electronics, and robot enthusiasts the science of programming, parts assembly, remote controlling, and robotics.
It makes the world of IoT interactive and provides hands-on experience to kids and adults.
Smart robot cars usually come in kits that can be assembled simply by following instructions (perfect for beginners). They can also be made from scratch by gathering three main components:
- Power source (external or internal)
- Sensory system (motion detection)
- Brain system (movement activation)
Smart robot cars are the way of the future of technology.
How to Build a Smart Robot Car?
Building a smart robot car from scratch is actually quite simple once you’ve got the materials gathered and the instructions printed out. Even if it doesn’t work, keep at it and you might just polish your skills well enough to make one on your own!
To build a smart robot car, you’ll need:
- Arduino Uno R3
- Rocker switch
- Screws
- Toy car chassis
- Wires
- Extendor nuts
- Nuts
- 4 AA batteries
- Male headers
- L293D motor drive shield
- TowerPro SG90 servo motor + SG90 arms
- HCSR-04 ultrasonic sensor + holder
- Mount for HCSR-04 and SG90 servo
- Caster wheel
- 2 speed encoders
- 2 gear motors 3V – 6V DC
- 2 tire wheels
- Mounts for wheels
- 9V battery + power cord (optional)
Tools you’ll need:
- Soldering iron
- Solder wick
- Silver-bearing solder
- Needle nose pliers
- Phillips head screwdriver
- Wire stripper
- Breadboard/foam pad (optional)
- Multimeter (optional)
Technology you’ll need:
- USB cable type A and B
- Arduino IDE (text editor)
- PC or laptop
After gathering all the materials, follow the steps below:
- Take out the SG90 servo mount and peel off the cover.
- Screw the SG90 servo to the mount using two screws and nuts.
- Place the ultrasonic sensor holder around the transmitter and receiver knobs (you may round up the edges or bend the holder if necessary).
- Solder the male headers between the L293D motor drive shield or sandwich them in between the Arduino and the motor drive shield if you aren’t soldering.
- Take the wire stripper and expose bare wire by cutting off the wire connections.
- Solder the wire then place it on the motor terminals to solder it again.
- On the toy car chassis, fit the motor mounts using two screws and nuts.
- On the inner part of the motor, add the speech encoders for voice automation.
- To the caster wheel, screw four nut extenders.
- Screw the caster wheel to the toy car chassis (drill holes if necessary).
- On the chassis, add the two tire wheels next to the screwed-in motors.
- Take the assembled servo mount and attach it to the chassis with two screws and nuts.
- To the servo holder, pin the servo arm using two screws that are no longer than the arm’s base.
- Secure the motor drive shield on top of the Arduino Uno R3, male pins with female pins.
- Place the motor drive and Arduino assembly to the chassis and pin using two screws and nuts.
- On the motor drive shield, screw the servo cord where the brown is for pin 1, red for pin 2, and orange for pin 3.
- Twist the servo pins so that they stand perpendicular to the ultrasonic sensor’s back.
- Screw in four wire jumpers and attach the other end to the power source after pinning the two headers that you soldered earlier.
- Strip the connections from the wires soldered to the motors, then attach them to the motor drive shield.
- For the power supply, tape the 4 AA batteries to the toy car chassis with two screws and nuts.
- With the face of the terminals upwards, fix the rocker switch in.
- Cut the red wire/power wire in half and solder it through the rocker switch.
- Pin the red wire from the rocker switch to the power end of the motor drive shield.
- Pin the ground from the 4 AA batteries to the ground slot of the motor drive shield.
- Power it on. The Arduino and the motor shield should be activated (seen from indicator lights).
- Download and install Arduino IDE and Sketch on Arduino Uno.
- Program the instructions, compile the code, and set the smart robot car speed to life.
- Check if it detects an obstacle. It should stop and rotate about 120° in case an obstacle appears.
- Then, it will either move back, turn left, or direct itself to the right.
- After avoiding the obstacle, it should run at full speed.
What Are the Most Important Factors to Consider When Zeroing in on a Smart Robot Car?
When you’re shopping for a smart robot car, it may seem easy to just pick up a kit and go home to build it…only to find out that it’s not made for your kind of set-up. To help you avoid that, we’ve jotted down all you need to keep in mind when purchasing a smart robot car.
Smart Navigation
Essentially all robots are designed with the Smart Navigation feature as it is the crux of turning a simple robot car into a smart robot car.
Smart Navigation is a single-touch mechanism that powers a smart robot car to activate, run at full speed, and avoid obstacles the best it can.
When the feature is activated, the smart robot car may move left, right, or back up. It may even jump to narrowly avoid a hurdle while speeding past it.
Ease of Use
Robots are easy to assemble but only when the instruction manual perfectly suits your level of knowledge and expertise. Make sure the robot kit you pick up is easy to understand.
Reviews of the 5 Best Smart Robot Cars
1. GILOBABY Interactive Kids Robot Car Age 4 – 7
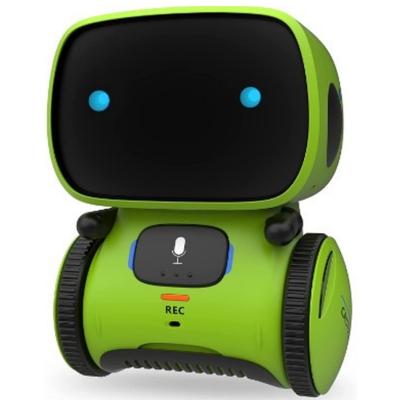
The GILOBABY Interactive Kids Robot Car is one of the best robots available for children aged 4 to 7 years. It’s durable in its construction, the paint doesn’t chip, and it lasts quite long – even in the hands of little monsters!
The voice-controlled features are impressive. It moves through spoken commands, repeats what the kids say, and even creates a musical environment by singing and dancing.
Features:
- Built-in recording button
- Touch sensor installed
- Volume adjustment
- Voice activation
- Voice repetition
- Voice command
- ABS Plastic construction
- 4 – 7 years age recommended
Pros
- Compatible with recordings,
- 8 seconds total time
- 3 total audios
- Durable design, lasts long, and does not wear out early
Cons
- Works better on hardwood floors
2. SunFounder Smart Video Car Kit v2.0
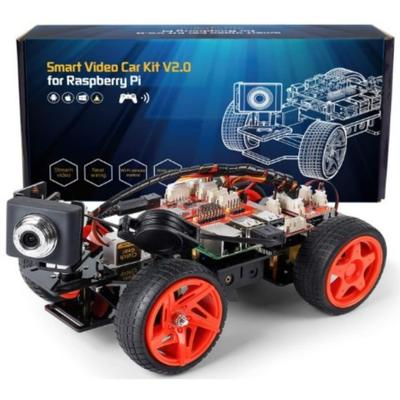
The SunFounder Smart Video Car Kit is a great DIY unit for kids aged 12+ and adults as well. It is powered by a RasPi.
The structure is not just durable, it’s actually shatter-proof. Python code is already programmed which simplifies coding for robotics beginners.
You can also see the video being recorded in real-time on a web browser.
Features:
- Real-time video transmission
- Built-in 120° wide-angle USB camera
- Visual programming language software provided
- Multi-type device remote control
- PCA9685 PWM driver
- Motor driver module
- 2 DC gear motors
Pros
- Python code can be debugged with Drag
- It by simple drag and drop
- Can be controlled via multiple screens (mobile, PC, tablet, etc.)
Cons
- Raspberry Pi not included
3. Robobloq STEM Metal Q-Scout Robot Mechanic Kit
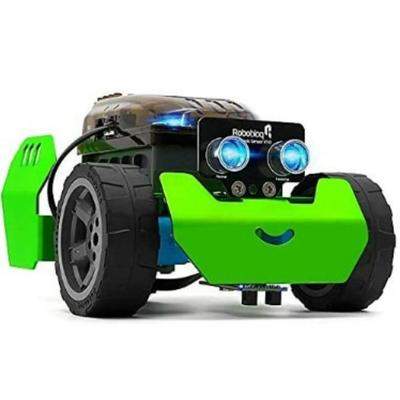
The Q-Scout Robot is an interactive, smart mechanic kit that is adapted with the Robobloq app. It connects via Bluetooth and can be coded on the go.
The kit is easy to assemble, almost child’s play as it’s specially designed for beginners to have fun while learning how to code. It can sing, dance, and can even be developed into a custom game designed by you.
Features:
- Drag-and-drop style coding
- Beginner-friendly
- Bluetooth-compatible Robobloq app
- Interactive
- Aluminium alloy coating
- Rubber tires
Pros
- Has an RGB light show, colors red and blue
- Equipped with a music library
Cons
- Finding instructions is non-intuitive
4. SunFounder Raspberry Pi Smart Video Robot Car Kit

The SunFounder PiCar-X is an artificially intelligent smart robot car that is compatible with RasPi and designed to make programming, robotics, and deep learning easy for beginners.
It’s built with multiple modules: an ultrasonic module, a line-tracking module, as well as a pan-tilt camera that all allow it to avoid obstacles, follow objects and recognize human gestures.
Features:
- AI self-driving robot
- Compatible with RasPi
- Multi-modules
- Exclusive RasPi hat as driving module
- Built-in speaker at RasPi hat
- Robust-finished aluminum body
- Multiple playing modes
Pros
- The PiCar-X has color detection and face detection
- Compatible with both iOS and Android smartphones and tablets
Cons
- Assembly takes time
5. Adeept 4WD Smart Robot Kit for Raspberry Pi
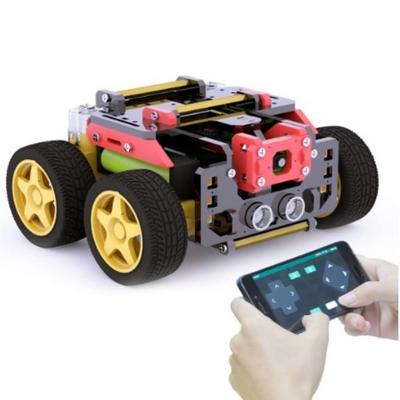
The Adeept Smart Robot Car is a four-wheeled vehicle powered by a RasPi and based on openCV. This allows the 4WD to detect, follow, and avoid objects based on specific colors, shapes, and lights.
Features:
- Four geared motors
- Scalable
- Object recognition
- Motion detection
- Line tracking
- Real-time video transmission
- App-controlled
- Built-in RGB LEDs
- Differential steering design
Pros
- The camera could be tilted for a wide angle
- Connects to a servo, robotic arm, and a camera
Cons
- The instruction tutorial is confusing
Frequently Asked Questions:
What three things make a robot?
For a robot to work, you’ll need a power source to activate its sensors and muscles. Then, you’ll need to pick up a sensory system that is capable of receiving information from the sensors about the environment, and a brain system that can use the collected data to direct the muscles.
Can kids operate a smart robot car?
Absolutely, there are smart robot car kits made for children as little as four years old so they can get hands-on experience of detailed assembly, programming, and robots. In fact, we’ve reviewed the GILOBABY Interactive Kids Robot Car above. It’s safe to use under adult supervision, durable, and user-friendly.
How does a robot car turn?
A robot car turns by following a process called Differential Steering where it rotates by changing the direction and speed of the motor between each wheel. It is capable of straight-line and in-place motion. Such smart cars are known as differential wheeled robots and are manufactured with two wheels.
Which motor is used in robots?
Different robots require the use of different motors but the vast majority are engineered with electric motors. If a robot’s primary movement is rotational and the load they carry is light, DC or AC motors may be used. The former is predominantly found in portable robots and the latter in industrial robots.
What is an Arduino robot car?
The Arduino robot car is a self-controlled automobile that is designed to detect and avoid obstacles via a built-in UltraSonic Sensor. When an obstacle has been detected, the sensor ‘eyes’ left to right and directs itself to move where the path is clear. It’s highly accurate and stable.
What is an obstacle-avoiding smart robot car?
It’s a smart robot car that is specifically designed to navigate through unknown environments by using its own intelligence, detect obstacles via a built-in sensor, steer itself away from the hurdle, and move in the direction that is clear using differential steering. DC motors are used here commonly.
Brief Summary
Raise your hand if you thought smart robot cars were rocket science. Well, with the tips above in mind and the reviews read, you can now build a smart robot car yourself. It’s that easy!

Claudio Sabato is an IT expert with over 15 years of professional experience in Python programming, Linux Systems Administration, Bash programming, and IT Systems Design. He is a professional certified by the Linux Professional Institute.
With a Master’s degree in Computer Science, he has a strong foundation in Software Engineering and a passion for robotics with Raspberry Pi.